Fuji S10-S
Getting Close
08/07/19 12:42 Filed in: Bike Builds
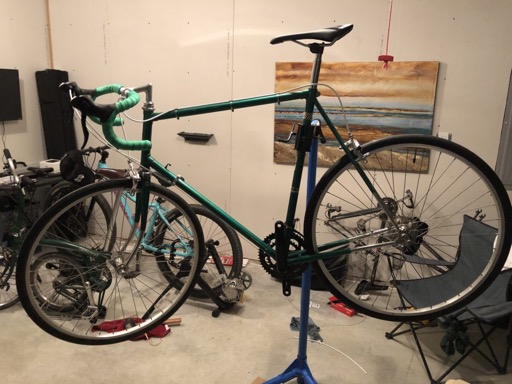
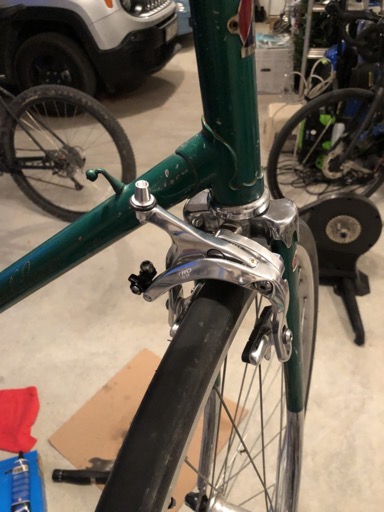
Brakes are connected and working. Shifters are installed and the new bar tape has been installed as well. The front derailleur and the cable guides are installed. As you can see, I went with white for the cable housing, in keeping with the original look. I hope to give it a test ride within a week. I just have the chain, pedals, and hook-up of the rear derailleur to do.
From Down Low To Up High
04/07/19 12:40 Filed in: Bike Builds
Good progress today. Yesterday, the crank set and the shifters came in. As I mentioned at the start of this, I’m modernizing the drive train. It’s for good reason, though: safety. While nostalgia is great, it’s blows monkey vomit if you’re dead or injured all because of a fixation on ensuring the bike is as period-perfect as possible. Based on my research, being period-perfect isn’t necessarily any cheaper, either. That’s not to say the bike will be unrecognizable from a 1973 Fuji S10-S when I’m done.
The new drivetrain is Shimano Tourney. No, it’s not what one would call a fantastic group set. However, it can be had with 14 speeds (2×7) and being new, I’d trust my life with it.
First thing installed today: the crank set.
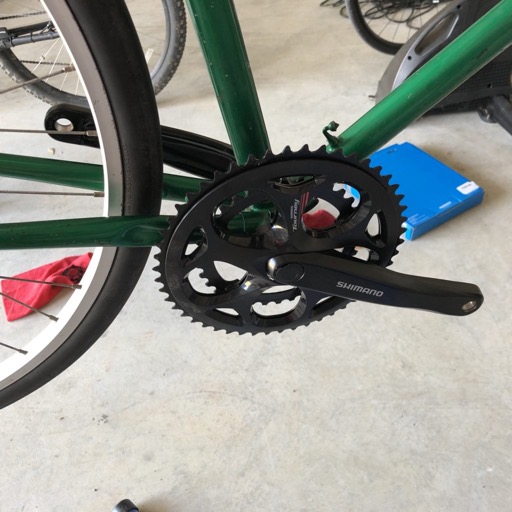
As I had been thinking that the ideal buyer for a bike like this would be a commuter, I just had a moment of questioning my decision to go without a chain guard. Hopefully it doesn’t hurt my chances of getting my money back from this project.
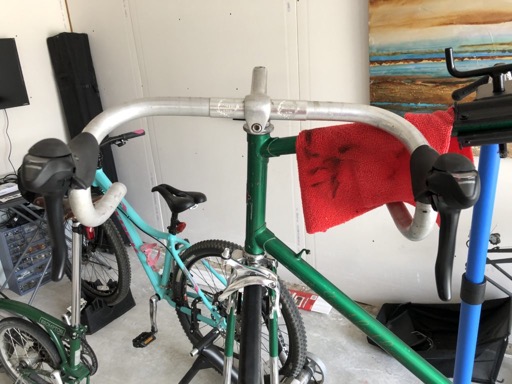
Next up today were the handlebars:

I’m keeping the handlebars because they’re an integral part of this bike’s identity. However, that bar tape and those brake levers need to go. The black bar tape pays no homage to the bike’s heritage. Additionally, based on videos I have watched, it appears it wasn’t installed correctly either.
Tourney STI shifters. Again, safety is the reason. It’s not just convenient that brakes and shifters are together. It’s safer not having to move your hands.
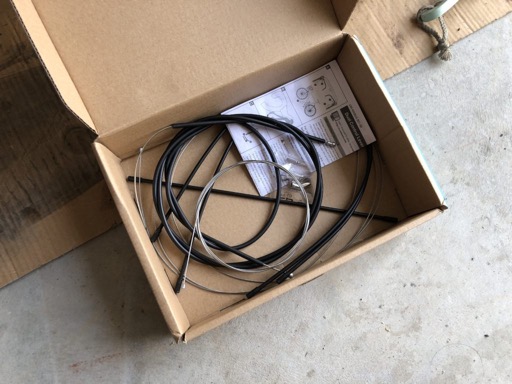
There was one surprise in the box the shifters came in. No, I’m not talking about the utter lack of instructions on how to install them. Thankfully there’s one guy out there who recorded a video of him doing the same thing as me, albeit with Sora bits. The surprise I’m talking about is the extra cabling and housing. The online description said it came with shifter cables and housing. It didn’t mention that it also came with brake cables and housing! Too bad, though, as they’re not going on the bike. Black just won’t look right in my opinion. Also, take a look at the original bike. The right cables should hopefully be installed Friday or Saturday.
The new drivetrain is Shimano Tourney. No, it’s not what one would call a fantastic group set. However, it can be had with 14 speeds (2×7) and being new, I’d trust my life with it.
First thing installed today: the crank set.
As I had been thinking that the ideal buyer for a bike like this would be a commuter, I just had a moment of questioning my decision to go without a chain guard. Hopefully it doesn’t hurt my chances of getting my money back from this project.
Next up today were the handlebars:
I’m keeping the handlebars because they’re an integral part of this bike’s identity. However, that bar tape and those brake levers need to go. The black bar tape pays no homage to the bike’s heritage. Additionally, based on videos I have watched, it appears it wasn’t installed correctly either.
Tourney STI shifters. Again, safety is the reason. It’s not just convenient that brakes and shifters are together. It’s safer not having to move your hands.
There was one surprise in the box the shifters came in. No, I’m not talking about the utter lack of instructions on how to install them. Thankfully there’s one guy out there who recorded a video of him doing the same thing as me, albeit with Sora bits. The surprise I’m talking about is the extra cabling and housing. The online description said it came with shifter cables and housing. It didn’t mention that it also came with brake cables and housing! Too bad, though, as they’re not going on the bike. Black just won’t look right in my opinion. Also, take a look at the original bike. The right cables should hopefully be installed Friday or Saturday.
Components Start Going On
03/07/19 12:37 Filed in: Bike Builds
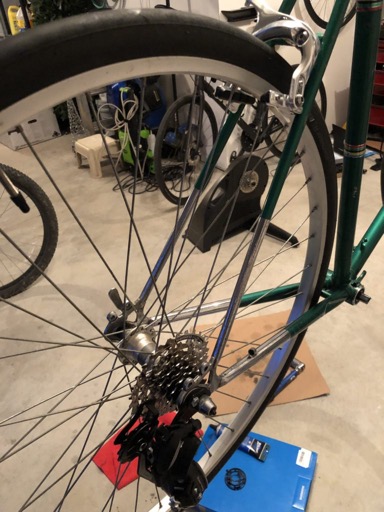
A new 7-speed cassette is now (mostly) on. I need a cassette removal tool with the guide for quick-release to be sure I have it installed with enough torque. The rear derailleur and the front and rear brakes are now also installed. The crankset will go on when I can get some Allen drivers for my socket wrench. Why? Again, applying the right torque.
Big Round Rolly Things
29/06/19 12:30 Filed in: Bike Builds
A couple weeks ago, I took the Fuji (I need to come up with a name) to Vélo Classique in Purcellville, VA. Felt most comfortable taking it there because they specialize in vintage bikes. The reason for the visit was that the distance between the forks was 96mm. I don’t have the tools or the expertise and he has both. Luckily, he was able to fit me in and get the fork spaced and aligned properly. Even got a spacer for the head set (see my previous post). The proprietor is a very nice fellow, and full of experience and advice he’s happy to share. He also told me I was on the right path with this bike, modernizing the drive train and brakes. Why? Safety. It’s what he does. Seriously, if old bikes are your thing and you’re in the area, give him a visit.
When I got back, I was researching wheels that would work. I went out and measured the wheels and realized something. The wheels I picked up with the frame have a cassette on them. Not only that, but they fit in the frame. They’re 700c, have a free hub and cassette, and they fit this ’73 Fuji without any bending of the frame. Things just got cheaper really quickly (assuming the wheels were in serviceable shape.
Now, this old cassette wasn’t presenting itself as something that would be easy to get off and it wasn’t. After a good bit of WD-40 and some elbow grease, I was able to get the axle off. With that off, and the loose bearings removed and accounted for, I could get to work on the cassette. More WD-40 and elbow grease and off came the cassette. My wife thinks I should frame it or otherwise make it into some sort of decoration. I agree.
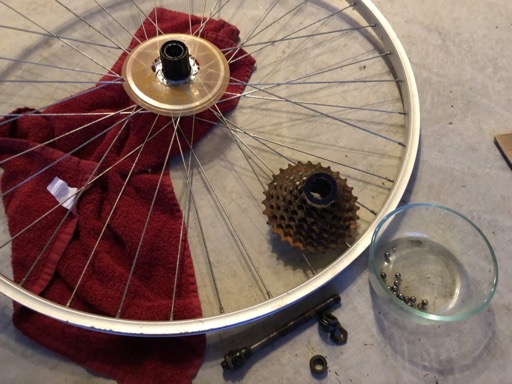
Next up was to examine the free hub. It appeared to be in proper working order, but just needed a good cleaning and regreasing.
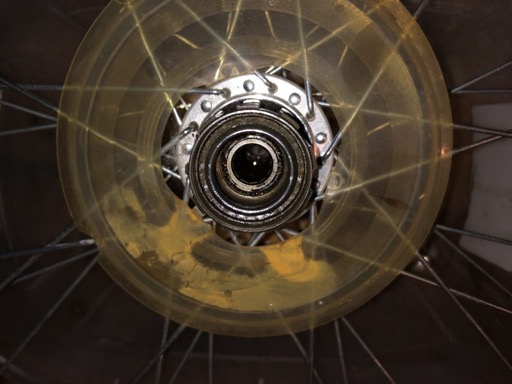
Not a difficult task at all. Got the bearings cleaned up and put back in with a good bit of fresh grease and the wheels mounted. It’s then I realized what my next task was. While the front wheel was good and true, the rear wheel was far from it. I ordered a spoke wrench and yesterday morning got to work. I was reminded of why I hated truing wheels back when I worked in Toys R Us in my college days. It’s especially bad when you have these old steel & chrome-plated spokes.
Alas, I got it trued to within 1mm and put back on the bike.
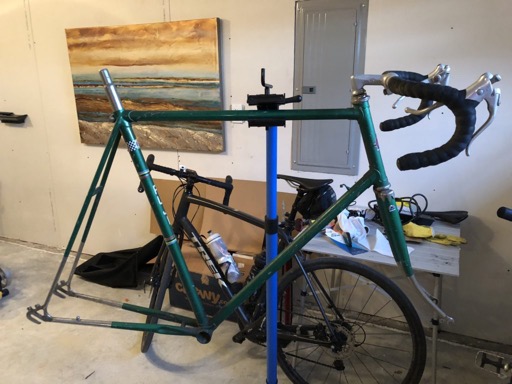
My intent is to get new gum wall tires. However, at least while the build is in process, I decided to save a few dollars (OK, more than a few 😝) and put the tubes and tires that originally came with my Trek road bike on the Fuji’s wheels. A quick trip to the LBS for some rim tape and a half hour in a hot garage has this looking more and more like a bike.

Over the next week or so, it’s going to start getting real. Drive train. Breaks. New bar tape. Stay tuned.
When I got back, I was researching wheels that would work. I went out and measured the wheels and realized something. The wheels I picked up with the frame have a cassette on them. Not only that, but they fit in the frame. They’re 700c, have a free hub and cassette, and they fit this ’73 Fuji without any bending of the frame. Things just got cheaper really quickly (assuming the wheels were in serviceable shape.
Now, this old cassette wasn’t presenting itself as something that would be easy to get off and it wasn’t. After a good bit of WD-40 and some elbow grease, I was able to get the axle off. With that off, and the loose bearings removed and accounted for, I could get to work on the cassette. More WD-40 and elbow grease and off came the cassette. My wife thinks I should frame it or otherwise make it into some sort of decoration. I agree.
Next up was to examine the free hub. It appeared to be in proper working order, but just needed a good cleaning and regreasing.
Not a difficult task at all. Got the bearings cleaned up and put back in with a good bit of fresh grease and the wheels mounted. It’s then I realized what my next task was. While the front wheel was good and true, the rear wheel was far from it. I ordered a spoke wrench and yesterday morning got to work. I was reminded of why I hated truing wheels back when I worked in Toys R Us in my college days. It’s especially bad when you have these old steel & chrome-plated spokes.
Alas, I got it trued to within 1mm and put back on the bike.
My intent is to get new gum wall tires. However, at least while the build is in process, I decided to save a few dollars (OK, more than a few 😝) and put the tubes and tires that originally came with my Trek road bike on the Fuji’s wheels. A quick trip to the LBS for some rim tape and a half hour in a hot garage has this looking more and more like a bike.
Over the next week or so, it’s going to start getting real. Drive train. Breaks. New bar tape. Stay tuned.
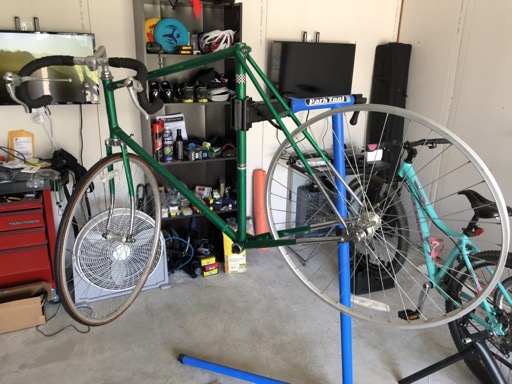
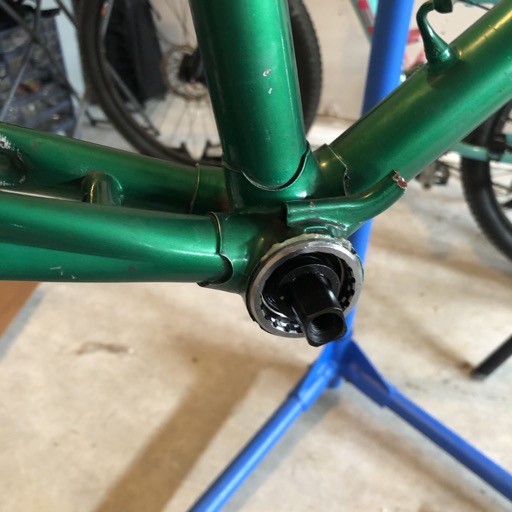
Bottom Bracket Is In
15/06/19 12:27 Filed in: Bike Builds
Well, after a mishap of ordering the wrong bottom bracket, I finally got it installed. When I measured the width of the space for the bottom bracket and converted it from imperial to metric, I got 70mm. What wasn’t clear to me was that 70mm = Italian and that my measurement was off by 2 mm. Lo and behold, the first one just wouldn’t fit. Ain’t bottom bracket standards grand?
Now, once I’m confident I have the right measurement of the space between the chain stays correct, I can order a the parts that, if my initial measurements are correct, will allow me to modernize this bike’s drive train.
Now, once I’m confident I have the right measurement of the space between the chain stays correct, I can order a the parts that, if my initial measurements are correct, will allow me to modernize this bike’s drive train.
Well I'll Be A Monkey's Father's Brother
11/06/19 13:20 Filed in: Bike Builds
In my previous post, I shared the tip from GCN to remove rust from a bicycle. I was a bit skeptical.
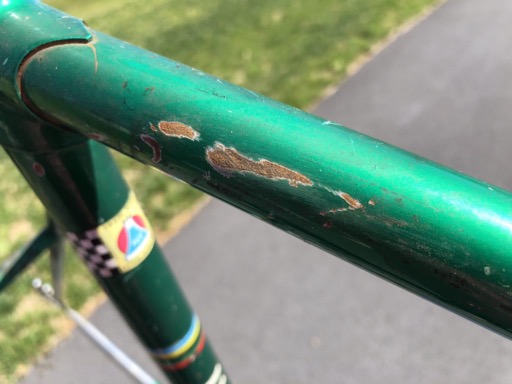
Before

After
Even gave the chrome some vinegary love.
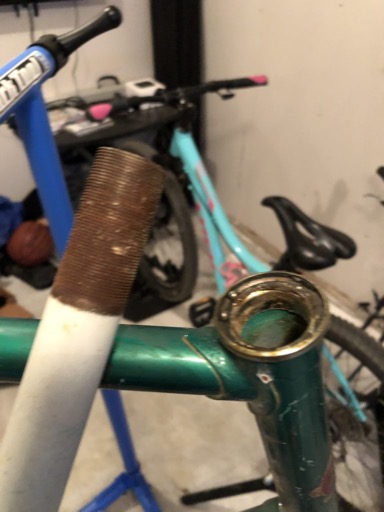
Cleaned up the bits of rust the best I could and put some clear coat on them. I then decided to clean up the seat post. Took some work getting it out. When I did, I learned that there’s a bit of a difference between seat posts of yore and those from this age. Perhaps it has to do with the more MTB-like geometry of road frames vs the taller frames from back then.

You call that a seat post?
Oh, and that’s where the wasps built their nest.
Before
After
Even gave the chrome some vinegary love.
Cleaned up the bits of rust the best I could and put some clear coat on them. I then decided to clean up the seat post. Took some work getting it out. When I did, I learned that there’s a bit of a difference between seat posts of yore and those from this age. Perhaps it has to do with the more MTB-like geometry of road frames vs the taller frames from back then.
You call that a seat post?
Oh, and that’s where the wasps built their nest.
Project Cost Estimated 😲
11/06/19 13:16 Filed in: Bike Builds
Yeah, kind of funny doing the math NOW. Anyway, the cost of this is going to be comparable to a new low-end bike, but more than the crap you can get at Walmart. While it’s true that this will not have 105 or Tiagra components, much less Ultegra. However, with this build, I’ll be focusing on maintaining the character of the bike, and making it rideable and safe.
The silly thing is, building up a vintage frame with period parts isn’t much cheaper. The drivetrain components are similar in cost on eBay as new Tourney parts. I’ll never get the investment back unless someone out there is keen for a bike like this. Facebook and Craigslist are awash with cheap and overpriced vintage bikes with vintage parts. Maybe the education I’m getting will make it worth it?
Anyway, bottom bracket’s been ordered. Time to clean the frame and see what I can do about the rust. I’ll see if the technique in this GCN video actually works.
Tackling the Fork
11/06/19 09:25 Filed in: Bike Builds
Before I could even start buying any parts, I needed to see if the fork was in serviceable condition.
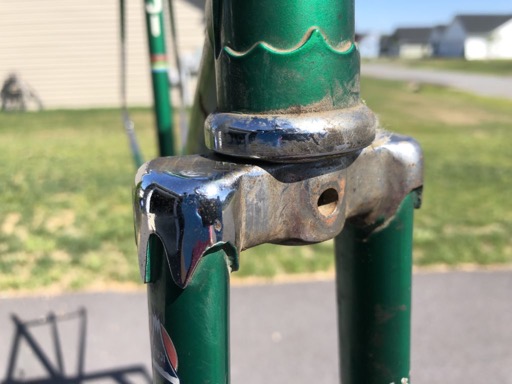
Good news. Rust wasn’t too bad and the only real issue was old, dirty grease. After cleaning it up and degreasing the bearings, I put it back together again. I just then noticed a gap!
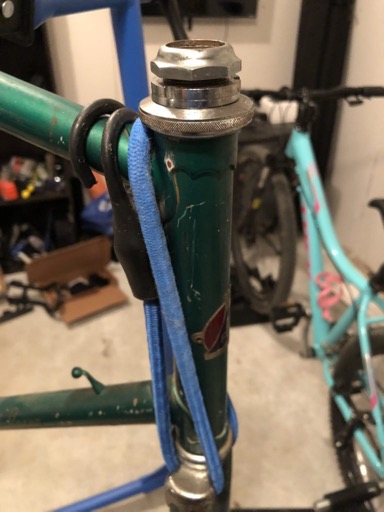
No, I didn’t misplace any parts. That gap is where the brake cable hanger goes. A part I’ll have to source. However, there was something extra in the down tube:
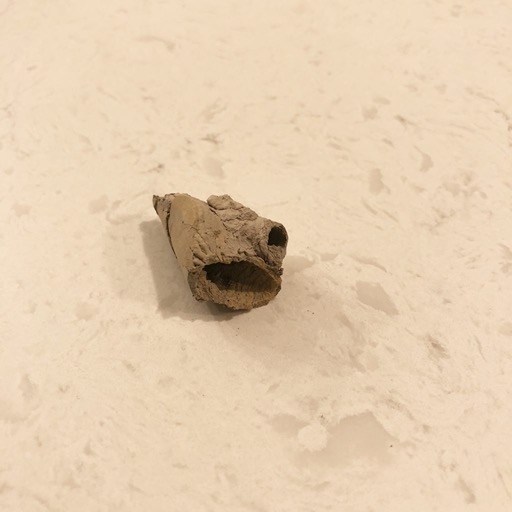
wasp nest?
Good news. Rust wasn’t too bad and the only real issue was old, dirty grease. After cleaning it up and degreasing the bearings, I put it back together again. I just then noticed a gap!
No, I didn’t misplace any parts. That gap is where the brake cable hanger goes. A part I’ll have to source. However, there was something extra in the down tube:
wasp nest?
Building A Bike Almost As Old As Me
11/06/19 08:09 Filed in: Bike Builds
I bought this Fuji frame off a Facebook posting. Originally, I did not want a frame older than 1996, about when STI (indexed) shifters were introduced. However, I was willing to consider an older frame if it looked “interesting.” This looked interesting. It looked to be in decent shape based on the pictures.
Anyway, after a 45-minute+ drive, I met the seller and the really nice guy that he was, he offered me any additional parts at no extra cost, even another frame. I took a few pieces that looked serviceable as well as that other frame (more on that at a later date) and insisted on giving him some more money. So, $30 later and I’ve got two frames and a few vintage bike parts.
This is a green Fuji S10-S (“Special Road Racer”). Apparently, this was a very popular model in the 70s (at least for Fuji). A lookup of the serial number indicates this is a 1973 model.
I had assumed that a restoration with period-specific components was the only option (a big reason why I wanted to avoid the truly vintage frames). Then I learned that there were indexed freewheels available. Then I came across a wheel that would fit in the drop-outs that would accept 7-speed freewheels.
As long as the fork, which wasn’t turning all that smoothly, was serviceable, I’ll be able to proceed.